Last update (Aug 29, 2009): The Pixma iP4500 is supported under Mac OS X Snow Leopard.
Check this link, scroll down the list, and you’ll see the iP4500 listed in the table. Apple has also provided a separate downlaod page for the driver download.
More information on printing in Snow Leopard can be found in the article Mac OS X v10.6: Mac 101 — Printing.
Product views
This is the Canon Pixma iP4500 on my table at home, with two A4-sized prints made on Canon Photo Paper Plus glossy media.
As you will discover from the early sections of my review, the iP4500 allows you to quickly get up to speed and get great prints without having to spend tons of money on expensive paper, or messing around with application or printer calibration settings and profiles.

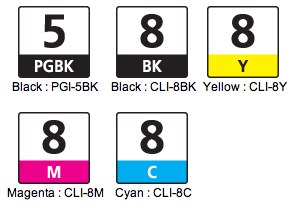
Inks used
The iP4500 uses 5 ink cartridges. The following graphic was taken from the help documentation:
Buying the printer
After paying for the printer at the shop, I immediately tested it right there and then.
The salesperson (Ah Tack — pronounced as Aaah Tuck) was very patient and made sure everything installed properly and the printer worked OK.
Installation
Software installation on my Macbook Pro was a breeze. You will have to restart the computer after the first part of the installation is complete.
Once the computer had been restarted, the installation continues with the print head alignment phase. You are prompted to insert two sheets of A4 paper into the rear tray, and the iP4500 then takes about 14 minutes to print out two test pages and perform the necessary alignments.
A shortcut to the iP4500 on-screen manual is placed on the desktop.
The first 4 x 6 / 4R print
I then launched iPhoto, selected and printed a photo. The iP4500 printed the picture very quickly (much faster than my HP C6180 in this respect) and silently, and when I viewed the print out, my jaw dropped.
It was perfect in every way, the colors, the brightness and vibrance, the sharpness and detail and the contrast. I’d say the print very nearly matched what I see on my MacBook’s screen.
Remember, this was done at the shop — there was no opportunity to do printer and paper profiling, or calibrating the screen and printer, or messing around with color adjustments. It was just, choose the photo, insert the paper and hit print in the application.
On my HP CP6180, the same photo prints out a bit darker, and this is regardless of whether I use HP’s Advanced Photo or Premium Plus papers.
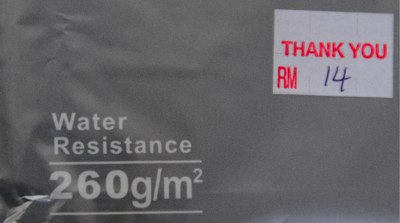
I actually forgot to mention the paper I used for this first print — it was a cheap, relatively unknown brand of 260 g/m2 “Premium” glossy photo paper, Esyink. I’m mightily impressed that the iP4500 isn’t fussy with the type of photo paper used.
Here are some photos of the Esyink packaging, just to give you an idea of the paper quality we’re talking about here.
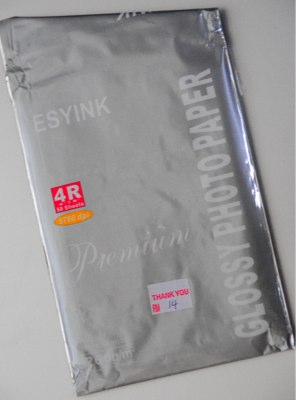
260 g/m2, RM 14 (Ringgit Malaysia — approx. $4 USD and change) for 50 pieces of 4 x 6 / 4R paper. That works out to be about RM0.28 ($0.08 USD) per piece.
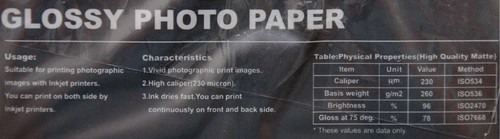
Paper specs — click to view a much larger photo.
The second 4 x 6 / 4R print
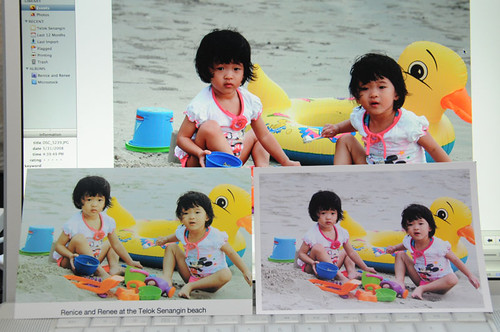
When I reached home, I set up the printer and immediately called up a photo of my twin girls for printing. I had previously printed this photo on a HP Advanced Photo paper with my HP C6180, and for some inexplicable reason, the photo started turning yellow within a few days.
Well, the iP4500 did extremely well, again. I used the same Esyink photo paper, and the tonality, vibrant colors and detail has to be seen to be believed. I know this isn’t the best way to show how closely the iP4500 print matches what I see on the screen, but I hope the following photo (shot with my Nikon D300 plus Nikkor 18-200mm VR and bounced SB-800 flash) gives you an idea:

I never managed to get the same kind of results with my HP printer, even when I used HP’s Premium Plus paper. The photo from the iP4500 also showed superior shadow tonality whereas on the CPC6180, I’d say shadow gradations were never convincingly nailed.
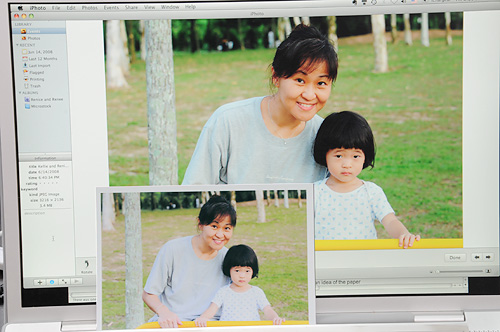
The photo below shows the image as seen opened up in iPhoto on my MacBook Pro screen, with the HP C6180 Advanced Photo Paper print (that has turned yellow) on the left, and the Pixma iP4500 print on the right.
I think I’m in printing heaven, for now. Let’s see how the printer, ink and the printouts hold up over the coming weeks and months.
Operating the iP4500
Ink Supply Information
Whenever I want to know about the ink levels remaining, I just call up the bundled iP4500 utility that’s automatically installed into the Mac’s printer system. The following screen capture shows the ink supply after I had printed 12 pieces of A4 (8” x 10”) color photos, 2 pieces of 4R (4” x 6”) color photos and 150 A4-sized sheets of documents.
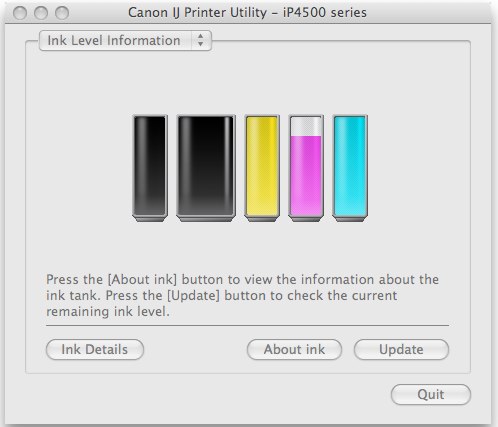
I’m impressed that only the magenta ink has dropped a little.
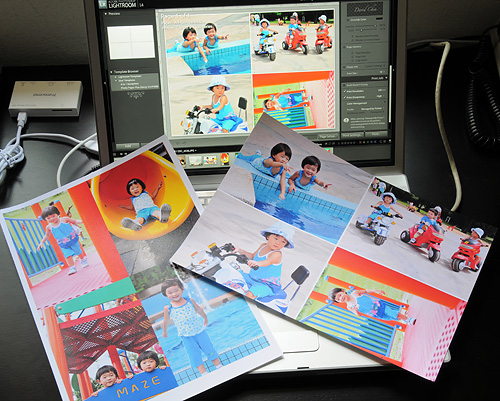
Printing via Adobe Lightroom
Printing through Lightroom was also a dead simple process.
I printed 8 photos on two sheets of A4 paper (4-in-1). The paper I used is from Esyink, a Resin Coated Satin Glossy photo paper, water-proof and 260 g/m2.
Once again, I was struck by the fact that I did not have to even perform any calibration or matching, or having to download any paper / printer profiles. I just selected the built-in Photo Paper Plus Glossy (one of Canon’s paper profiles) for the first print, and Glossy Photo Paper (a generic profile) for the second.
Both prints came out to be of about the same quality. What was more important was tonality and colors were just like I saw them on the screen.
Another quality of the iP4500 prints that I’ve noticed is human faces appear “bright” and clear. I don’t really know of any other way to put this, but the faces in prints from my HP C6180, even after a bit of curve lifting and using HP’s top-of-the-line Premium Plus paper, always appear a tad muddy and dark. When I place photos of people printed from both printers side by side and view them from a little distance away in a room with the curtains drawn, I’m always able to discern the faces in the Canon prints, whereas it’s hard to make out the faces in the HP prints.
Here’s a snapshot to illustrate what I meant about “bright faces” in iP4500 prints. I find the skin tones to be just plain flattering. The same Lightroom process and paper as in the previous example were used.
