Here’s a quick how-to on converting your photo to an IR (infrared) version.
I obtained the steps from The Adobe Photoshop CS3 Book for Digital Photographers (by Scott Kelby).
Step 1
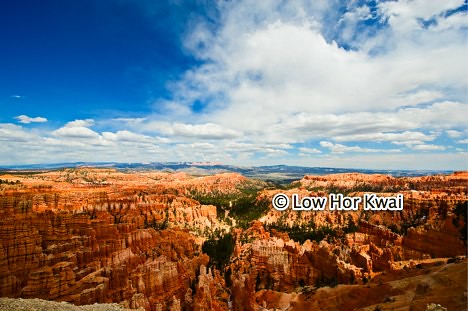
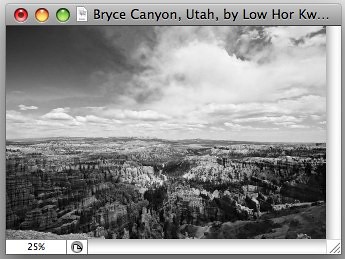
Open the photo in Photoshop.
I used the following image of Bryce Canyon, Utah, for this tutorial, courtesy of my pal Low Hor Kwai.
Step 2
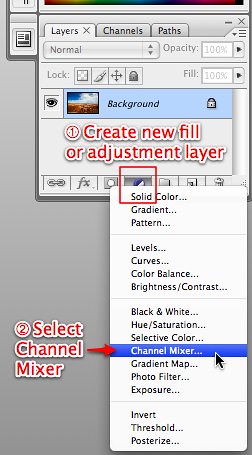
In the Layers panel (the default location of which is the bottom right of your Photoshop screen), click the Create new fill or adjustment layer icon, and then click Channel Mixer.
Step 3
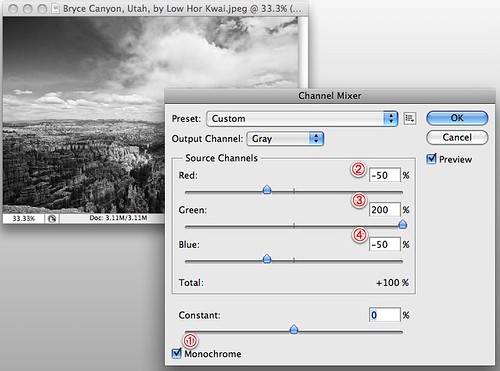
Enter the following base settings (these serve as a starting point) in the Channel Mixer dialog:
- Turn on the Monochrome checkbox.
- Set the Red channel to -50% (either drag the channel slider or enter the value directly into the box).
- Set the Green channel to 200%.
- Set the Blue channel to -50%.
Step 4
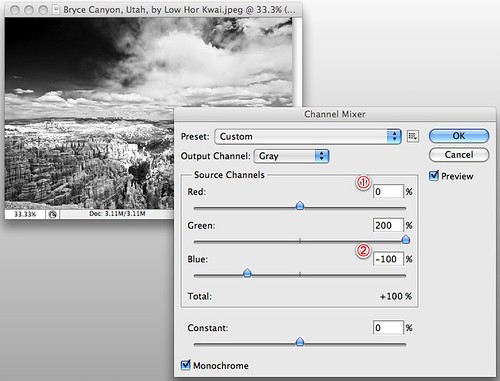
Scott explains that Step 4 results in a photo that mimics what you’d get with a Hoya R72 infrared filter on your lens.
The objective here is to make the sky look almost black, and make the white clouds whiter.
Dragging the sliders around lets you evaluate the effect on the photo.
Enter the following values:
- Increase the Red channel back to zero. This makes the clouds whiter.
- Lower the Blue channel to -100%. This makes the blue sky darker.
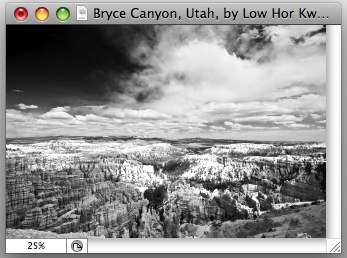
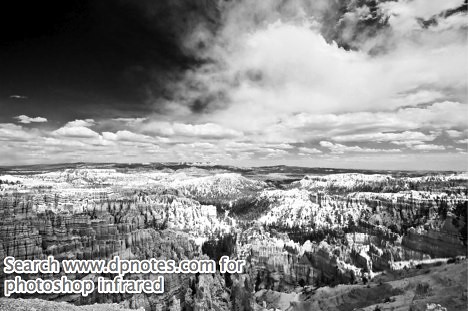
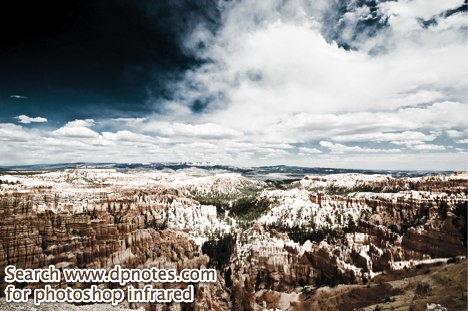
Step 3 vs Step 4
Observe the impact different values in the Channel Mixer has on the output. The values input in Step 4 results in a much more dramatic infrared photo.
Step 3
Step 4
Add a Color Infrared effect
If you’d like to give a little color to the B&W infrared photos you got out of Step 3 or 4, continue reading.
I’ll use the output from Step 4 for the remainder of this section of the tutorial.
Step 5
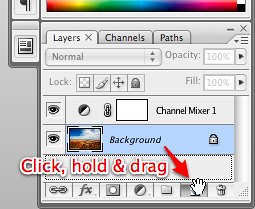
Duplicate the background layer.
In the Layers panel, click on the Background layer, hold and drag to the Create a new layer icon.
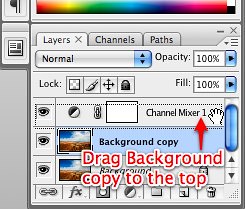
Step 6
Drag the Background copy layer to the top of the layer stack.
Step 7
Do the following for the Background copy layer:
- Change the layer blend mode to Overlay
- Lower the Opacity to 50% (or to taste).

Final Results
Output from Step 4 — B&W IR sample
Output from Step 7 — Color IR sample
Original
Related
Adobe Photoshop — Main page