Adobe Photoshop Lightroom has a handy tool that you can use to quickly remove chromatic aberration (CA) in photos.
First, click the thumbnail below to view a large version (open it up in a separate browser window if necessary) of the screen capture that I’ve done to show you the steps.
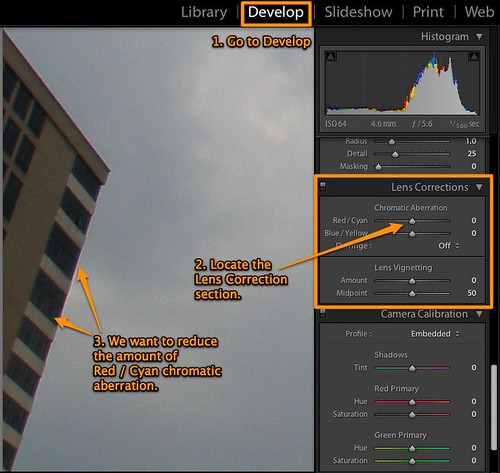
Do you see that there are traces of red / cyan CA around the edges of the building?
Step 1: With the photo open in Lightroom, click Develop.
Step 2: Grab the scroll bar on the right and scroll through the list of adjustments until you come to the Lens Correction section.
Step 3: Adjust the Red / Cyan chromatic aberration slider until as you see the CA disappear. Every photo is different, so it sometimes helps for you to make a big initial adjustment in one direction (cyan CA becomes red CA and vice versa) and then slowly go the other way until the CA is removed satisfactorily.
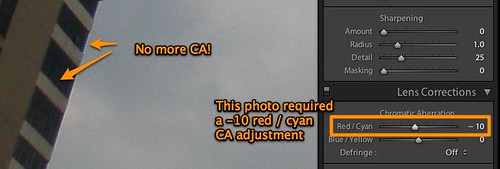
For this particular photo, I had to dial in a -10 for the red / cyan CA adjustment.
Hope this helps, and let me know if you have any questions.